Showing posts with label paint. Show all posts

Saturday, August 4, 2012

Craft: T.A.R.D.I.S.


Craft #5

So.
 There's this show. 
It's British.
It's science fiction.
It's about a 906 year old alien who has two hearts, thirteen lives and travels time and space in a blue phone booth from the 1950's. 
He calls himself the Doctor.
And he is awesome. 


Not to mention that the Doctor Who 50th Anniversary is coming up! (See above video for related awesomeness)
Unfortunately, the next season of Doctor Who is not scheduled to air until this Autumn, and after that God knows when it will hit the U.S.of A.
So to bide the time until then, I made a T.A.R.D.I.S.


(That's "Time And Relative Dimensions In Space" for newbies and non-Whovians.)


Cool like bowties.
:)


This beauty is crafted entirely from wood, with a lift-off cookie jar style top and foam padding on the bottom of inside. I owe a huge thanks to my dad and his power tools! The outside is hand painted. The windows, light on the roof, and the letters of "POLICE BOX" are coated in invisible day glow paint.

And, it won a lovely purple ribbon, in case you couldn't tell from the image. Who knows? Maybe I have some colorblind readers? LOL

Final note: This was actually the second T.A.R.D.I.S. I made, the first belongs to my co-author Hunter (KexFett) now.


Merry not-even-close-to-Christmas Hunter!


Now if you'll excuse me I must be off. Worlds to save, homework to conquer, the usual. Until next time! Geronimo!


~Heather


Friday, August 3, 2012

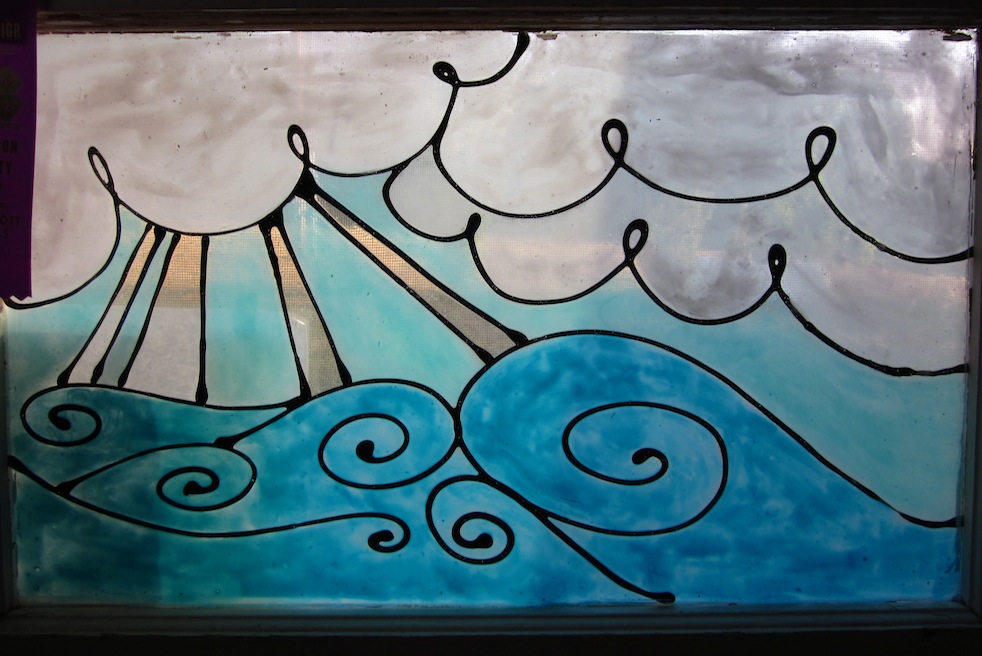
Craft: Faux Stained Glass

Craft #4

Today I've got a shiny winey thing I call 
"faux stained glass".
(creative name, I know. lol)
All you need to make it is Elmer's glue and acrylic paint!


Step One:  Gather your ingredients
  • a sheet of glass 
  • acrylic paints
  • white glue
  • clear glue
  • brushes 
  • something to stir with


For the glass, you could use cheap picture frames from Wal-Mart, or even an old window like I did. Also, firmer brushes work best to keep bubbles from forming. I recommend acrylic brushes if you can find them.

Step Two:  Mix your colors

To make the black lines, you'll need black acrylic paint, and white Elmer's glue. Squirt some of the glue out to make room in the bottle. Then pour the black paint into the glue drop by drop, mixing after each drop until the glue is completely black.Make sure not to leave white on the inside walls of the bottle, it must be mixed thoroughly.

For the colored areas, pick or mix the color of your choice in paint. Fill a small (preferably disposable) container with glue, then drip a drop of paint into it and stir. The average ratio should be a drop of paint to a Tbsp of glue, but I've learned the hard way it's not nearly so simple. In truth, you're probably going to have to go through some trial and error before you find the mixture that's just thick enough. Remember it should be consistent in color, and thin enough to see silhouettes through at least. It's hard to tell while the mixture is in a container, so I highly recommend finding some broken glass or something to test it on.


Step Three: Make lines

You can do this part freehand if you'd like, or you can draw a design on paper and trace it. Either way, you'll need to take the bottle of black glue and use it to "draw" lines on your glass. Beware: It tends to *glob* at the ends. This one could probably use some practice as well. 

Step Four: Apply color

Now's the part where you take your brushes and brush/dab all of your pretty color in between the lines. The color needs to touch the lines. If your color is too strong it may show on top of the black, but if your mix is thin enough it should be more or less invisible. Even so I've found it's easiest to just display the glass from the opposite side. (lol lazy me XD) If your mix turns out to be too thin, feel free to apply several layers. 

And there you go.
Of course mine doesn't look exactly like stained glass, but I wasn't trying too hard for that either. Next time maybe I'll use a reference? I dunno. As usual I dare you all to top me ( which shouldn't be hard) and let me know about it. 

Now go out and make something beautiful!


P.S. This piece has been chosen for the state fair! Wish me luck!